The Power of Remote Control

What You'll Learn
Lumen has its own interface, but can be controlled from other places as well. We call this Remote Control (or RC for short). RC opens up a lot of exciting options, such as playing a live show using a hardware controller, or making visuals for a music video that move along with the song!
Right now, Lumen supports only one method of RC: The good ol’ MIDI Protocol. MIDI has been around for a long time and is widely supported, especially in the world of audio gear.
If you’re looking to quickly set up a hardware MIDI controller to use with Lumen, check out the Quick Start Guide. Since getting up-and-running with a hardware controller is already covered there, this guide will go a little more in-depth on:
- Managing and editing MIDI Mappings
- What kinds of MIDI controllers work well with Lumen
- Controlling Lumen from other apps, with an example using Ableton Live
But first, let’s cover the basics of how MIDI works and what you can do with it.
How MIDI Works
The MIDI protocol was designed in the early 80s as a way to control and sequence notes for audio synthesizers. MIDI Sources send little packets of information called Messages to Destinations. These messages tell the MIDI destinations what to do. There are many different kinds of messages - some send musical notes, some control playback, and some change parameters.
Being focused around messages gives MIDI a lot of flexibility. This allows you to make connections between devices without either one having to know about the other - they just have to know about the same kinds of messages. MIDI is so flexible that you can still use it to control a synthesizer released in 1983 with modern software! This open-endedness helped it to become an incredibly popular and long-lived technology that is used by artists all over the world.
MIDI 2.0 This guide is focused on MIDI 1.0. The next generation, version 2.0, is still the new kid on the block and is not as widespread. Lumen does not support MIDI 2.0 yet, but probably will in the future.
Tons of stuff supports MIDI. That’s why it was the first RC protocol we added to Lumen. There are so many tools that use it, some of which you might already have!
MIDI Sources
Here are some examples of things that can act as MIDI sources (meaning they send MIDI messages):
- Music production apps, like Ableton Live, Bitwig Studio, or Renoise
- Hardware MIDI controllers, such as MIDI Keyboards, or more interesting ones
- Hardware synthesizers often work as MIDI sources
- Apps for phones & tablets
- If you play wind instruments, you’re covered too
- Seriously, almost anything. Plants, anyone?
MIDI Destinations
Similarly, so many things can receive MIDI messages, but don’t expect them to all be audio-related. MIDI has evolved to be used for many different things, including audio synths, drum machines, VJ apps, lighting controllers, and even old game consoles.
…and don’t forget Lumen!
MIDI RC in Lumen
It’s important to know that Lumen acts only as a MIDI Destination. It can respond to incoming MIDI messages, but can’t send out any of its own. Put another way, you can use some other thing to remote-control Lumen, but you can’t use Lumen to remote-control something else.
Tech Note Some controllers support Bi-Directional Control, which can do things like light up LEDs on a MIDI controller to show the value of a virtual instrument’s parameters. Lumen does not support bi-directional control right now.
Now that you know Lumen’s place in the MIDI universe, let’s dive into how to make a MIDI Remote Control setup for it.
Picking MIDI Sources
All Remote Control settings in Lumen are found in the RC Popup, which you can show by clicking the RC Button:
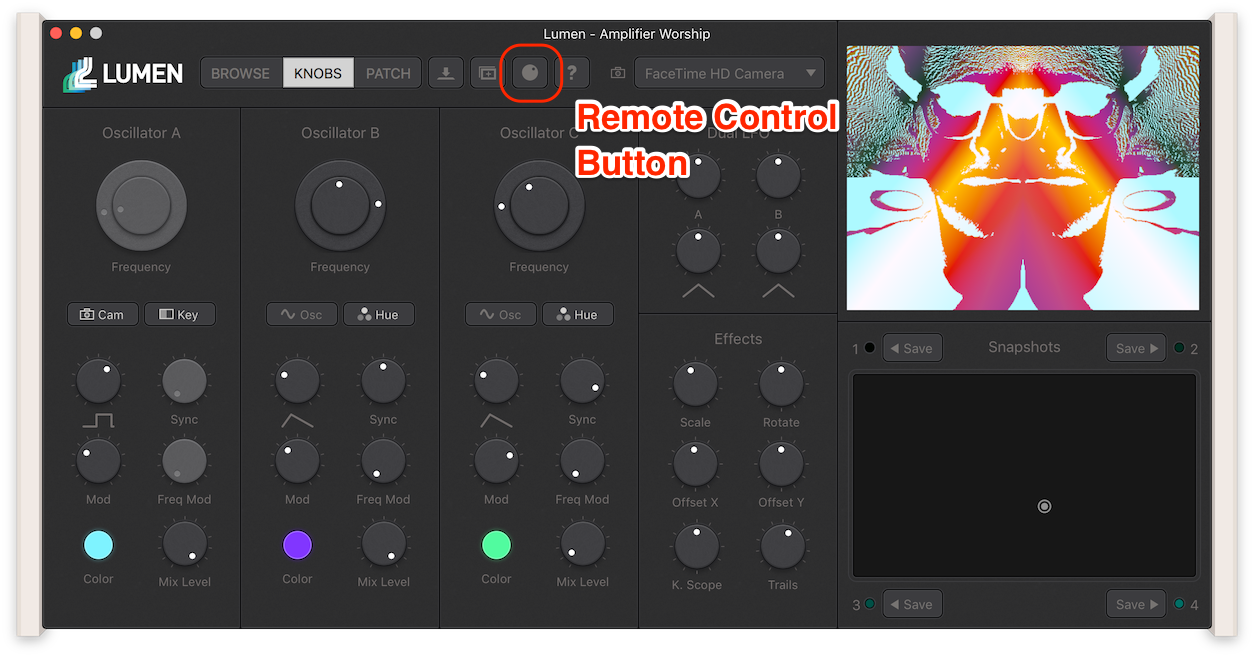
You can also get there using the Command+M keyboard shortcut.
At the top of the RC Popup, you’ll see the MIDI Source Picker, where you can select sources to use with Lumen:
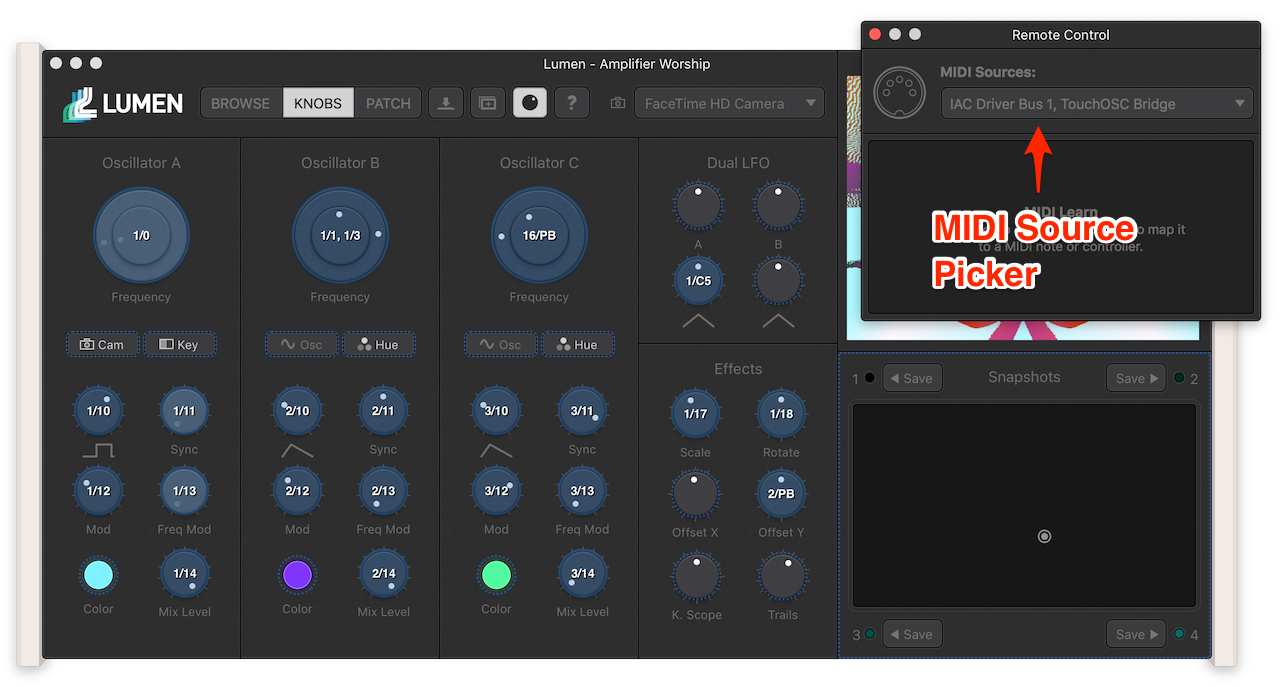
Lumen will only respond to messages from the sources that you select. To control Lumen with more than one source at a time, just select them all and their messages will be processed together.
Mappings & Actions
We know that MIDI sources tell destinations what to do by sending messages to them. One of the things that makes MIDI so flexible, though, is that these messages don’t say exactly what to do - they just give a general idea. Ultimately, it’s up to the destination to determine how to react to messages.
In Lumen, Mappings define how MIDI messages will be interpreted. A Mapping forms a link between a specific MIDI message and a specific Action. Actions are anything in Lumen that can be remote-controlled - for example, “Set the Frequency of Oscillator A” or “Save a Snapshot to Slot 1”.
Mappings act like a playbook that Lumen can follow. Any time Lumen gets a message from a MIDI source, it flips through this playbook, finds all the mappings that match the message, and does the corresponding actions.
Note Lumen’s mappings are “global,” meaning that they’re shared between all Lumen patches and all MIDI sources. There is no way to switch between different sets of mappings, yet, but it’s something we’d like to add in the future.
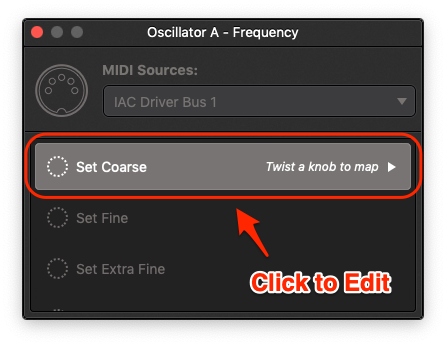
Let’s look at some actions. With the RC Popup open, you can see blue outlines around the controls in Lumen. We call these RC Targets:
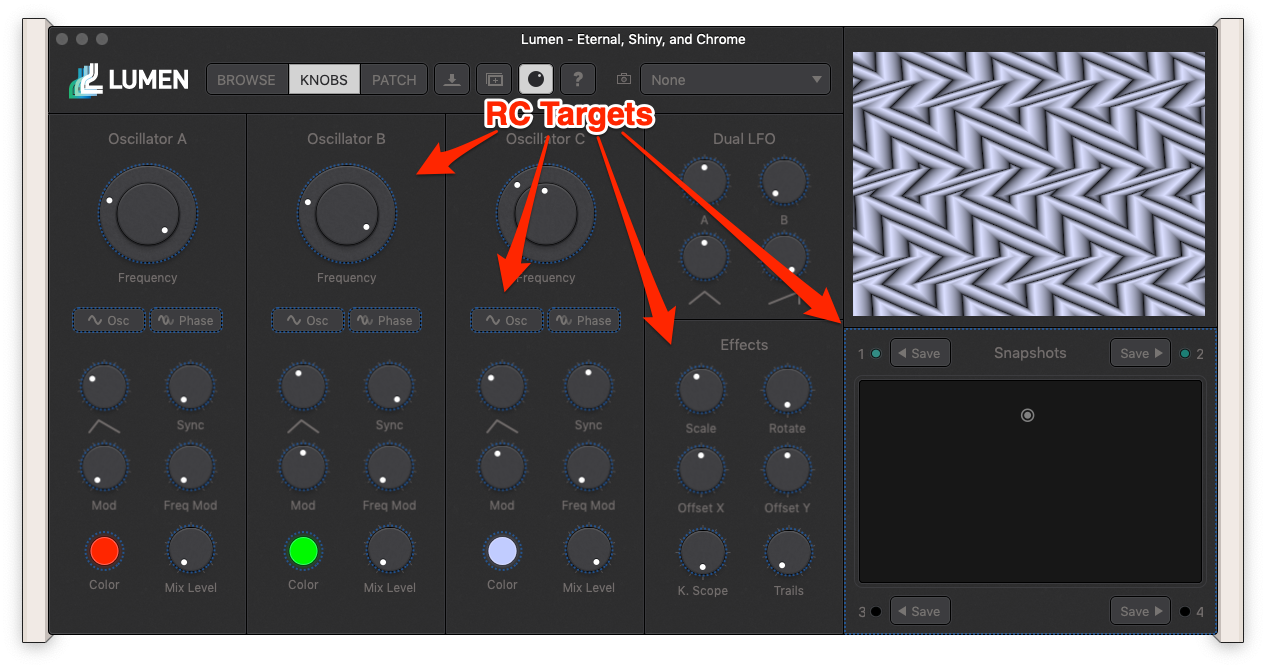
Each RC target has actions that can be mapped. Click on a target to see which actions can be mapped to it:
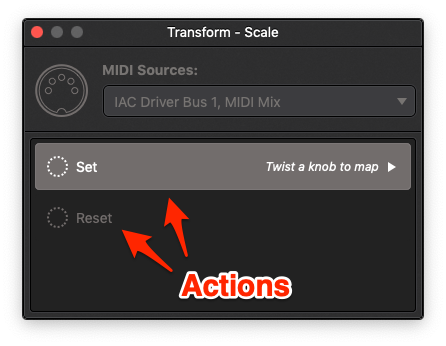
Click around on different RC targets (on the Patch Panel too!) to explore what can be remote-controlled. Some of the most common kinds of actions you’ll find are:
- Set - twists a knob
- Increment - clicks a button
- Reset - moves a knob or button back to its default setting
A few RC targets have unique actions:
- Oscillator Frequency - the Set Coarse, Set Fine, and Set Extra Fine actions work like the focus knobs on a microscope to provide a finer level of control
- K. Scope - has independent Set Divisions and Set Rotations actions
Pro Tip When controlling Lumen with a mouse, you can get a similarly fine level of control by holding down the
Controlkey while twisting knobs.
Creating Mappings
There are two ways to create MIDI mappings in Lumen.
MIDI Learn lets you make mappings quickly and easily without knowing any technical details. In this mode, Lumen listens for incoming MIDI messages. When it receives a message, it maps the currently selected action to that message. MIDI learn is always on, so you don’t have to do anything special to use it. Creating mappings with MIDI learn is covered by the MIDI section of the Quick Start Guide.
MIDI learn works well with MIDI sources that only send messages when you press a button or twist a knob, like hardware controllers. For tools that send MIDI messages continuously, the Manual Editing process is a better fit.
Note It’s tough to manually edit mappings without having some knowledge of the different kinds of MIDI messages that exist and what data they carry (channel, controller number, note number, etc). Check out the MIDI Mapping Options section of the Appendix for more details. For an intro from a musical perspective, this article is super helpful.
Manually Editing MIDI Mappings
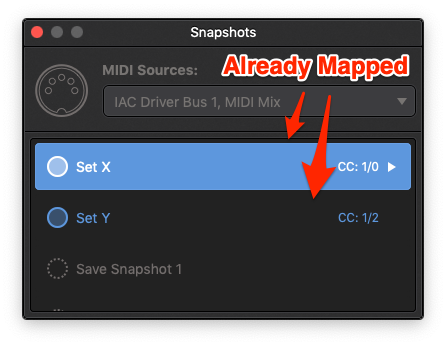
When viewing an RC target in the RC Popup, an action might be highlighted - this is the Selected Action. You can select an action by clicking on it:
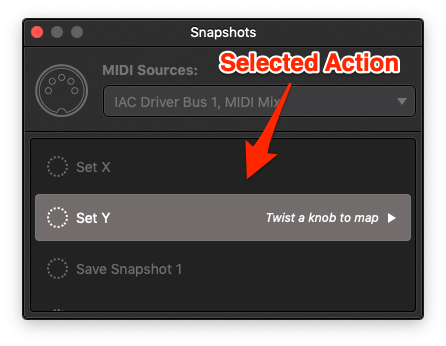
If an action has a mapping already, it will be blue:
Note Each action in Lumen can have only one mapping, meaning two different MIDI messages cannot trigger the same action. If you to try to create a second mapping for an action, it will just replace the first one.
Editing Details
To view the details of a mapping, click the currently selected action:
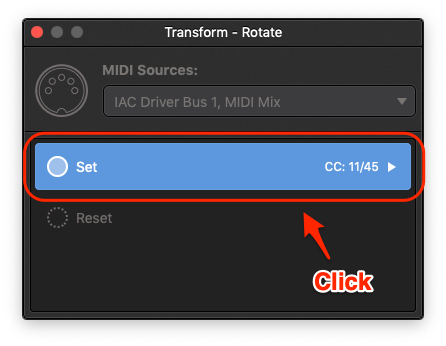
If the action has a mapping, you’ll see all its options listed:
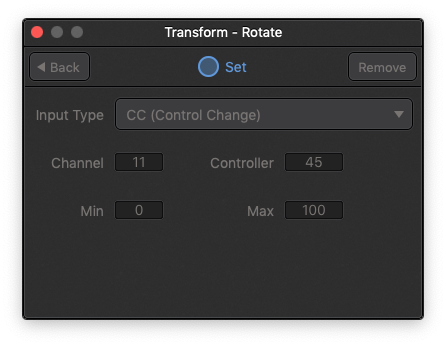
If the action does not have a mapping, the Input Type will be None:
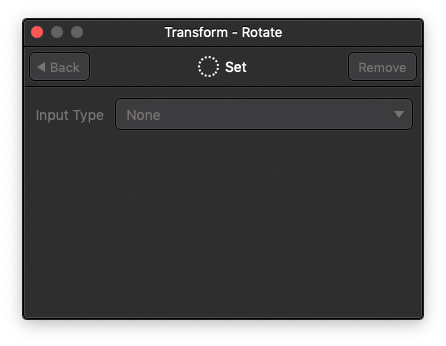
In this case, you can manually create a mapping by picking a different input type.
The input type determines the kind of MIDI message this mapping will respond to. Each one has its own set of options.
Further Reading You can learn more about the various mapping options in the Appendix.
While you’re manually editing a mapping, MIDI learn is temporarily turned off, but it will turn back on when you finish editing by clicking the Back button. You’ll want to un-select any MIDI sources that send continuous messages in the MIDI Source Picker before you start manually editing mappings - otherwise, your manual edits may be overwritten! Afterward, remember to re-select the MIDI sources you want to use.
Future Feature We’re planning to add an on/off button for MIDI learn in an upcoming release to make manual editing easier.
Removing Mappings
To delete a mapping, click the Remove button in the top-right of its details screen. You can also select it while browsing and press the Delete key.
For a completely clean mappings slate, select Patch -> Remove All Mappings from Lumen’s main menu.
Duplicate Mappings
You can map two separate actions to the same MIDI message. This is called a Duplicate Mapping. As an example, you can have one knob on your hardware controller configured to move two different knobs in Lumen at the same time.
Actions with duplicate mappings are yellow:
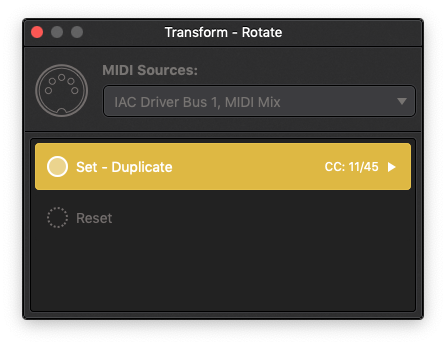
Duplicate mappings can be super handy when you want them, but they’re easy to lose track of! We’ve made them more visible in the interface to help you avoid creating duplicates by accident.
Pro Tip When editing the details for a mapping that has duplicates, you’ll see an option to remove each of its duplicates so you don’t have to find and remove them one-by-one.
Now that you’re fluent in the language of MIDI mappings, let’s talk about some practical uses of RC.
Choosing a MIDI Controller
Using a hardware MIDI controller with software synth can bring the experience to life. If you’re wondering what kinds of controllers work well with Lumen, this is the section for you! If not, feel free to skip to the next section.
Compatibility Checklist
For a controller to work with Lumen, it needs to send the right MIDI messages! Lumen can respond to three types of MIDI messages:
Pitch Bend, for knobsCC (Control Change), also for knobsNote On/Off, for buttons
Luckily, these are the most basic message types and almost any MIDI controller can send them! It’s worth double-checking which messages a controller can send in its manual, though.
Further Reading For technical details of Lumen’s MIDI implementation, see the Appendix.
What to Look For
Going beyond mere compatibility, here are some other useful features of MIDI controllers:
- Lots of Knobs or Faders - More knobs = more hands-on control!
- Ability to Switch Control Profiles - Lumen has more knobs than most controllers. Controllers with multiple control profiles can be configured to send different sets of MIDI messages, meaning you can map more Lumen controls with fewer physical knobs.
- Can Send Pitch Bend Messages - These are high-resolution RC messages, which are smoother than regular CC messages.
- Flexibility - Even better than switching control profiles is the ability to design a custom controller for yourself. TouchOSC is a fantastic app that lets you do this. Just be sure to download the free “TouchOSC Bridge” Mac app as well, so you can send MIDI to Lumen.
Controllers We Use at Paracosm HQ
- Akai MIDIMix - This one is super portable and has a lot of knobs! That said, they had to make the knobs pretty small to fit so many in, and it’s not as sturdy as some other controllers.
- Novation LaunchControl - This little guy has a solid feel, plus the ability to switch control profiles. They don’t make the original version anymore, but the newer LaunchControl XL is very similar.
Neither of these controllers sends pitch bend messages, but they’re both relatively inexpensive.
RC From Other Apps
Controlling Lumen from other apps opens up a ton of creative possibilities. You could use a DAW, MIDI Sequencer, control utility, or any app that can send MIDI messages.
Gotta Go Fast We completely rewrote Lumen’s MIDI system in version 1.1.0, vastly improving RC performance. If you plan to follow along with the Ableton Live walkthrough below, please update Lumen to 1.1.0 or later by selecting Lumen -> Check for Updates from the main menu.
If you’re not looking to control Lumen from other apps, feel free to skip ahead to the tips and ideas section to see what else you could do with MIDI RC.
Introduction
Let’s walk through how to make Lumen move in time with music. In this walkthrough, we’ll use Ableton Live (version 9) as an example, but many of these steps will apply to other music apps as well.
Setting up Live to send MIDI to Lumen might seem intimidating if you aren’t very familiar with MIDI. But we’ll break it down step-by-step! Follow along, and you’ll be slingin’ MIDI messages before you know it.
Hey Video People! If you learn better through videos, here is a recording of a 1-hour workshop where Jason nervously covers the same material!
Enable the IAC Bus
Before you start, you’ll need to enable the IAC Bus in macOS, which lets you send MIDI messages between apps. Follow these steps to enable it if you haven’t already. This applies even if you’re not using Ableton Live, and you’ll only have to do it once!
Use the IAC Bus as MIDI Output in Live
Next, tell Live to send MIDI through the IAC Bus:
- Open up Live if you haven’t already
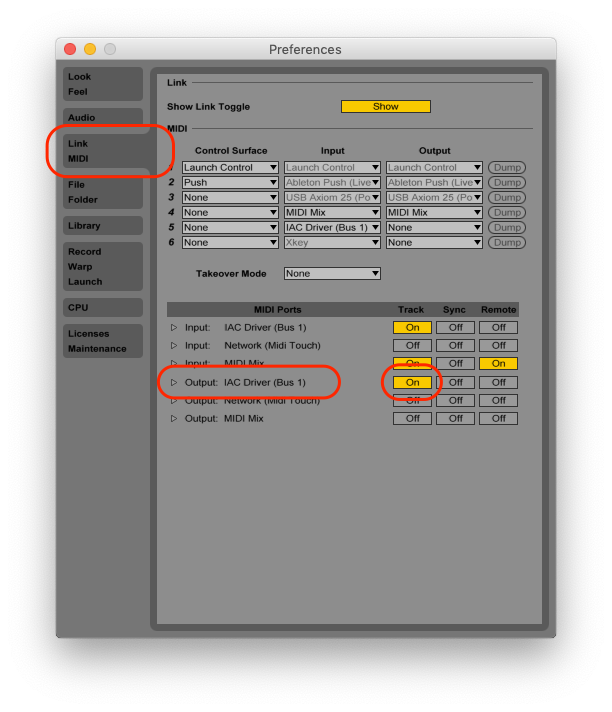
- Select the Live -> Preferences menu item
- Click on the Link MIDI tab in Live’s preferences
- Locate the MIDI Ports column
- Next to Output: IAC Driver (Bus 1), set Track to
On:
Set the MIDI Output on an Ableton Track
There are a few last setup steps in Live before we can start sending MIDI to Lumen. We’ll operate from the Session View for this walkthrough, since it’s the easiest to get going.
-
Create a MIDI track by selecting Create -> Insert MIDI Track from Live’s main menu
-
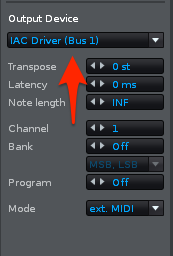
Set the MIDI Output to
IAC Driver (Bus 1)and the Channel toCh. 1for that track:
-
Set the MIDI Input on the MIDI track to something other than
All Insor theIAC Driver (Bus 1). We do this in order to avoid creating a MIDI FEEDBACK LOOP where Live sends MIDI back to itself. ChoosingNo Inputkeeps it simple for now: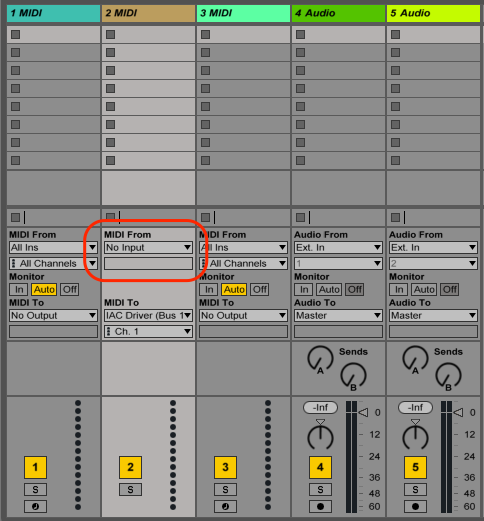
Draw an Envelope in a MIDI Clip
Now let’s get Live to send some Pitch Bend messages to Lumen! A straightforward way to do this is by drawing an Envelope, which some other DAWs call an Automation Curve:
- Create a new MIDI Clip to hold the Envelope by double-clicking in one of the slots on your MIDI Track
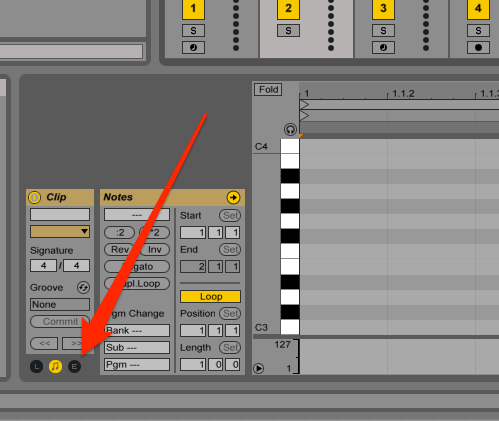
- With that clip selected, find the absolutely tiny “E” icon in the lower left to show the Envelope:
- The Envelope starts with a
Pitch Bendmessage type, which is what we want: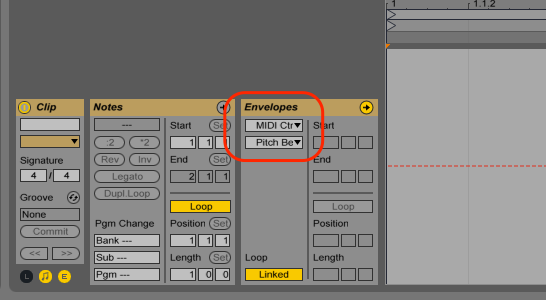
- There’s a red dotted line on the right side of the screen. Click and drag up and down on it a couple times in different places to draw a shape for the Envelope:
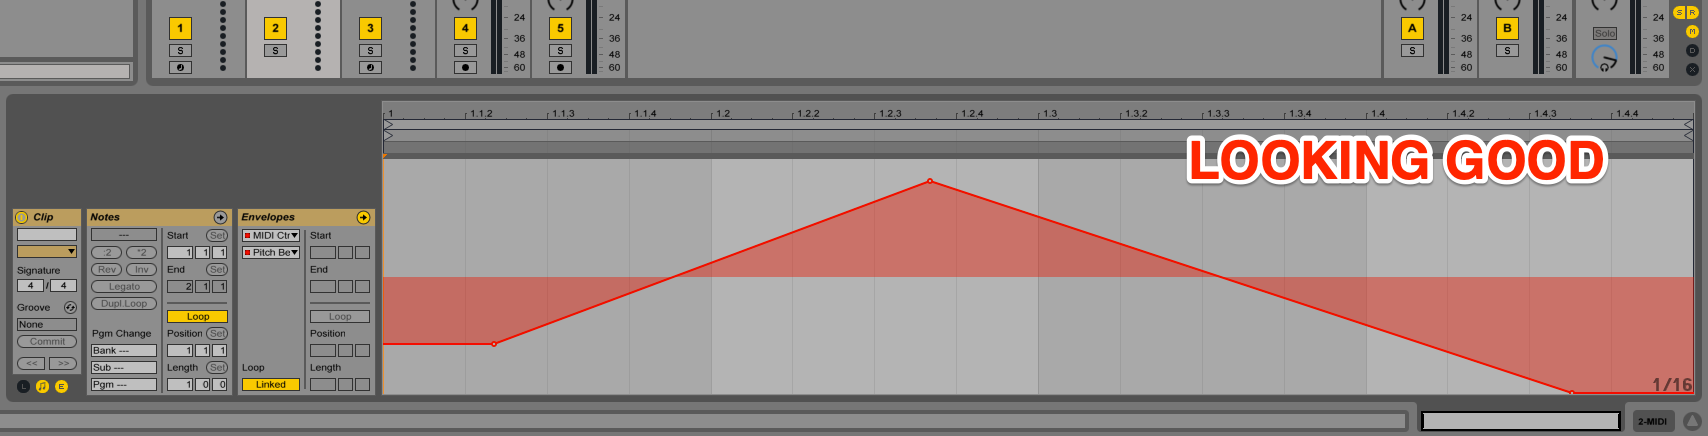
Now Live will send MIDI pitch bend messages on IAC Bus Channel 1 any time this clip is playing!
However, we still need to create the right mapping in Lumen, so don’t play the clip just yet.
Create a MIDI Mapping in Lumen
Using a MIDI track as we’ve done, Live will send a continuous stream of MIDI messages to Lumen as soon as it starts playing. Because of that, we can’t use MIDI learn to build the mapping. We’ll need to follow the Manual Editing process.
- In Lumen, open the RC Popup with the
Command+Mkeyboard shortcut or by selecting Patch -> Remote Control Mappings from the main menu - Enable
IAC Driver Bus 1as a MIDI source by picking it from the MIDI Sources dropdown: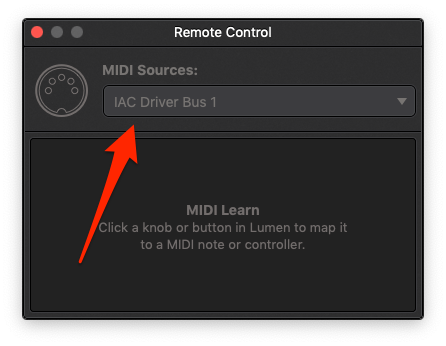
- Click the RC Target you’d like to control in Lumen, such as Oscillator A’s Frequency knob.
- Select an action, such as Set, and click to edit the mapping:
- Select
Pitch Bendin the Input Type picker, which matches the type of MIDI message we’re sending from Live - Channel should already be set to
1, which matches the channel we configured in Live, so we can leave the rest of the options as they are: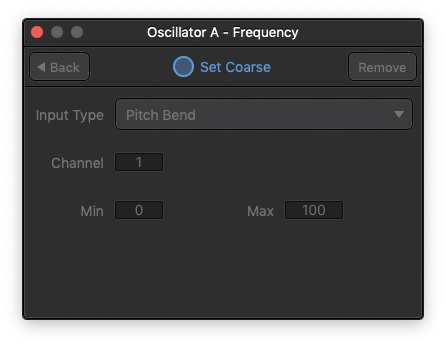
Now that we’ve created the mapping, you can close the RC Popup. Head back over to Live and hit play on the MIDI Clip with the Envelope you made. Et voilà! Switch back to Lumen to witness the miracle of Remote Control!

Next Steps
You can repeat this process for anything else in Lumen that you want to control from Live. But remember that the mapping you created will be triggered by all pitch bend messages that come in on Channel 1.
To create unique mappings, use different combinations of message type, channel, and controller number to send messages. For example, you could create a new MIDI track and clip that outputs on channel 2 instead. Or, you might make a new envelope in the same MIDI clip that sends a different message type, like CC.
Further Reading Check out the MIDI Mapping Options section of the Appendix for more info about how Lumen handles different MIDI messages.
You’ll probably end up going back and forth between Lumen and Live as you’re creating other mappings. Just remember to stop Live’s playback before you manually edit mappings so that you don’t overwrite them with MIDI learn.
Bonus Points Live’s MIDI Clips can also send MIDI notes to trigger Lumen’s buttons or to move knobs quickly between two positions. This lets you create super-fast changes in visuals that can easily be aligned to the beat. You’d use the
Note To Gateinput type for this.
Other Tips & Ideas
Audio-Reactivity
It’s even possible to use RC to make Lumen move to audio! You’ll just need a program that can convert audio into MIDI messages and send those messages to Lumen.
For example, if you’re a Max for Live user, you can use the Envelope Follower control device to generate Pitch Bend or CC MIDI messages based on the volume level of a track in Live. If you combine this technique with send tracks and filters, you can even automate parameters based only on specific frequency ranges.
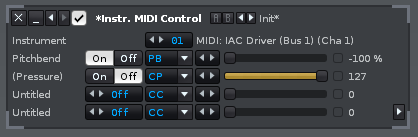
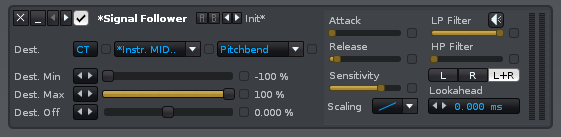
Many other music production apps can do similar things. For example, in Renoise, you can use the Signal Follower and MIDI Control effects together with an Instrument that outputs on the IAC Bus like this:
Remote-Controlling the Snapshots XY Pad
Mapping the Snapshots XY Pad is a great way to see dynamic changes in your visuals! However, there are some downsides. For one, while the snapshot pad is moving, you won’t be able to modify any other parameters in Lumen, since the snapshot pad’s changes will be moving the other knobs at the same time.
You can get around this by holding down Command while you’re twisting a knob in Lumen’s interface. This saves the position of that knob to all snapshots at once, so even if the snapshot pad moves the knob at the same time, it will move it to the value you want.
RC Lumen with Control Voltage?!
If you have a modular synth with a CV-to-MIDI converter module (not a MIDI-to-CV converter, which goes the other way), then you can convert control voltages into MIDI messages that can be sent to Lumen. We’ve used the Squarp Instruments Hermod for this, but any CV-to-MIDI converter will work if it can send MIDI CC messages independently from notes.
Tech Note Audio-rate or video-rate signals can’t be used to control Lumen in this setup. Lumen can only show you the results of new MIDI messages at its frame rate, which is 60Hz. For sending video from an LZX-compatible modular video synth into Lumen, see the External Signal Processing Guide.
Nice!
There are so many ways you can connect your visuals to the outside world. With that power unlocked, you may be asking yourself:
- “How can I push my video synth skills even further?”
- “Is there somewhere I can see each and every parameter in Lumen explained in detail, along with patch ideas?”
- “What if there was a Pokédex, but for like… synthesizer parts?”
For the answers to these questions and more, look no further than the Submodule Reference

